With the help of this practical Invoice Template For Self Employed, you can level up your productivity, sales cycle, and your entire organization.
Being self-employed comes with its own set of challenges, and managing your finances is one of them. Creating and organizing invoices can be a time-consuming task, but it's crucial for maintaining a steady cash flow. That's where ClickUp's Invoice Template for Self-Employed professionals comes in handy!
With this template, you can:
Don't let invoicing become a hassle. Try ClickUp's Invoice Template and take control of your finances today!
When using the Invoice Template for Self Employed, you can enjoy a range of benefits that streamline your invoicing process and help you maintain a professional image:
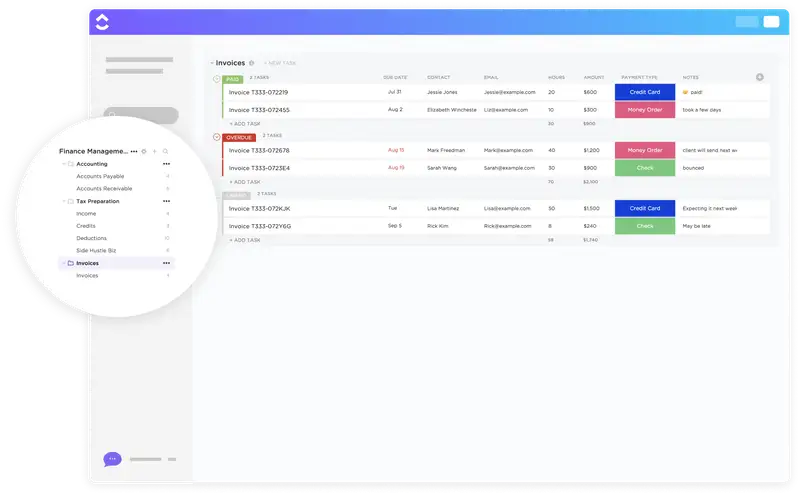
ClickUp's Invoice Template for Self Employed is the perfect solution for freelancers, consultants, and small business owners to streamline their invoicing process and get paid faster.
Here are 7 steps to help you effectively use the Invoice Template for Self Employed in ClickUp:
Start by customizing the invoice template to reflect your branding and personal style. Add your logo, business name, and contact information. You can also modify the layout and color scheme to match your brand's aesthetics.
Use the Docs feature in ClickUp to easily customize and save your invoice template.
Enter your client's details, including their name, address, and contact information. Make sure to double-check the accuracy of the information to avoid any issues with delivery or payment.
Use custom fields in ClickUp to keep track of your client's information and easily populate it in your invoice template.
Include important details such as the invoice number, invoice date, and payment terms. Be clear and specific about the services or products you provided, along with the quantity, rate, and any applicable taxes or discounts.
Use custom fields in ClickUp to keep track of your invoice details and easily populate them in your template.
Calculate the total amount due, taking into account any taxes, discounts, or additional fees. Make sure to provide a breakdown of the charges so your client understands how the total was calculated.
Use the Table view in ClickUp to calculate the total amount and create an organized breakdown of charges.
Clearly state your preferred payment methods and provide detailed instructions on how and where your client should make the payment. Include any necessary banking or account information to make the payment process smooth and hassle-free.
Use custom fields in ClickUp to store your payment instructions and easily include them in your invoice template.
Before sending out your invoice, review and proofread it to ensure accuracy and professionalism. Check for any typos, grammatical errors, or formatting issues. A well-presented and error-free invoice will leave a positive impression on your clients.
Use the Calendar view in ClickUp to set reminders for reviewing and proofreading your invoices before sending them out.
Once you're satisfied with your invoice, send it to your client using your preferred method, such as email or a dedicated invoicing platform. Keep track of sent invoices and their payment status to ensure timely follow-ups and efficient cash flow management.
Use the Email feature in ClickUp to send your invoices directly to your clients and the Dashboards feature to track your invoicing and payment status.
By following these steps and utilizing ClickUp's features, you can streamline your invoicing process and ensure that you get paid promptly for your services as a self-employed professional.
Self-employed individuals can use the ClickUp Invoice Template For Self Employed to streamline their invoicing process and ensure timely payments from clients.
First, hit “Add Template” to sign up for ClickUp and add the template to your Workspace. Make sure you designate which Space or location in your Workspace you’d like this template applied.
Next, invite relevant members or guests to your Workspace to start collaborating.
Now you can take advantage of the full potential of this template to create professional invoices: